
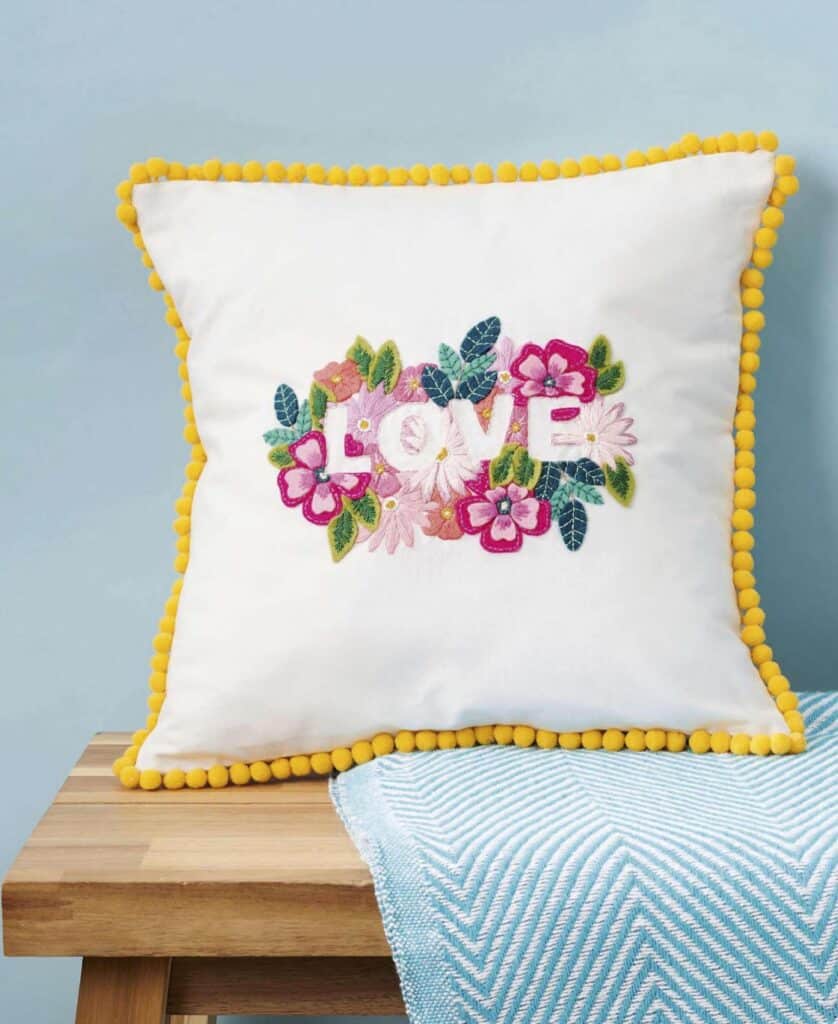
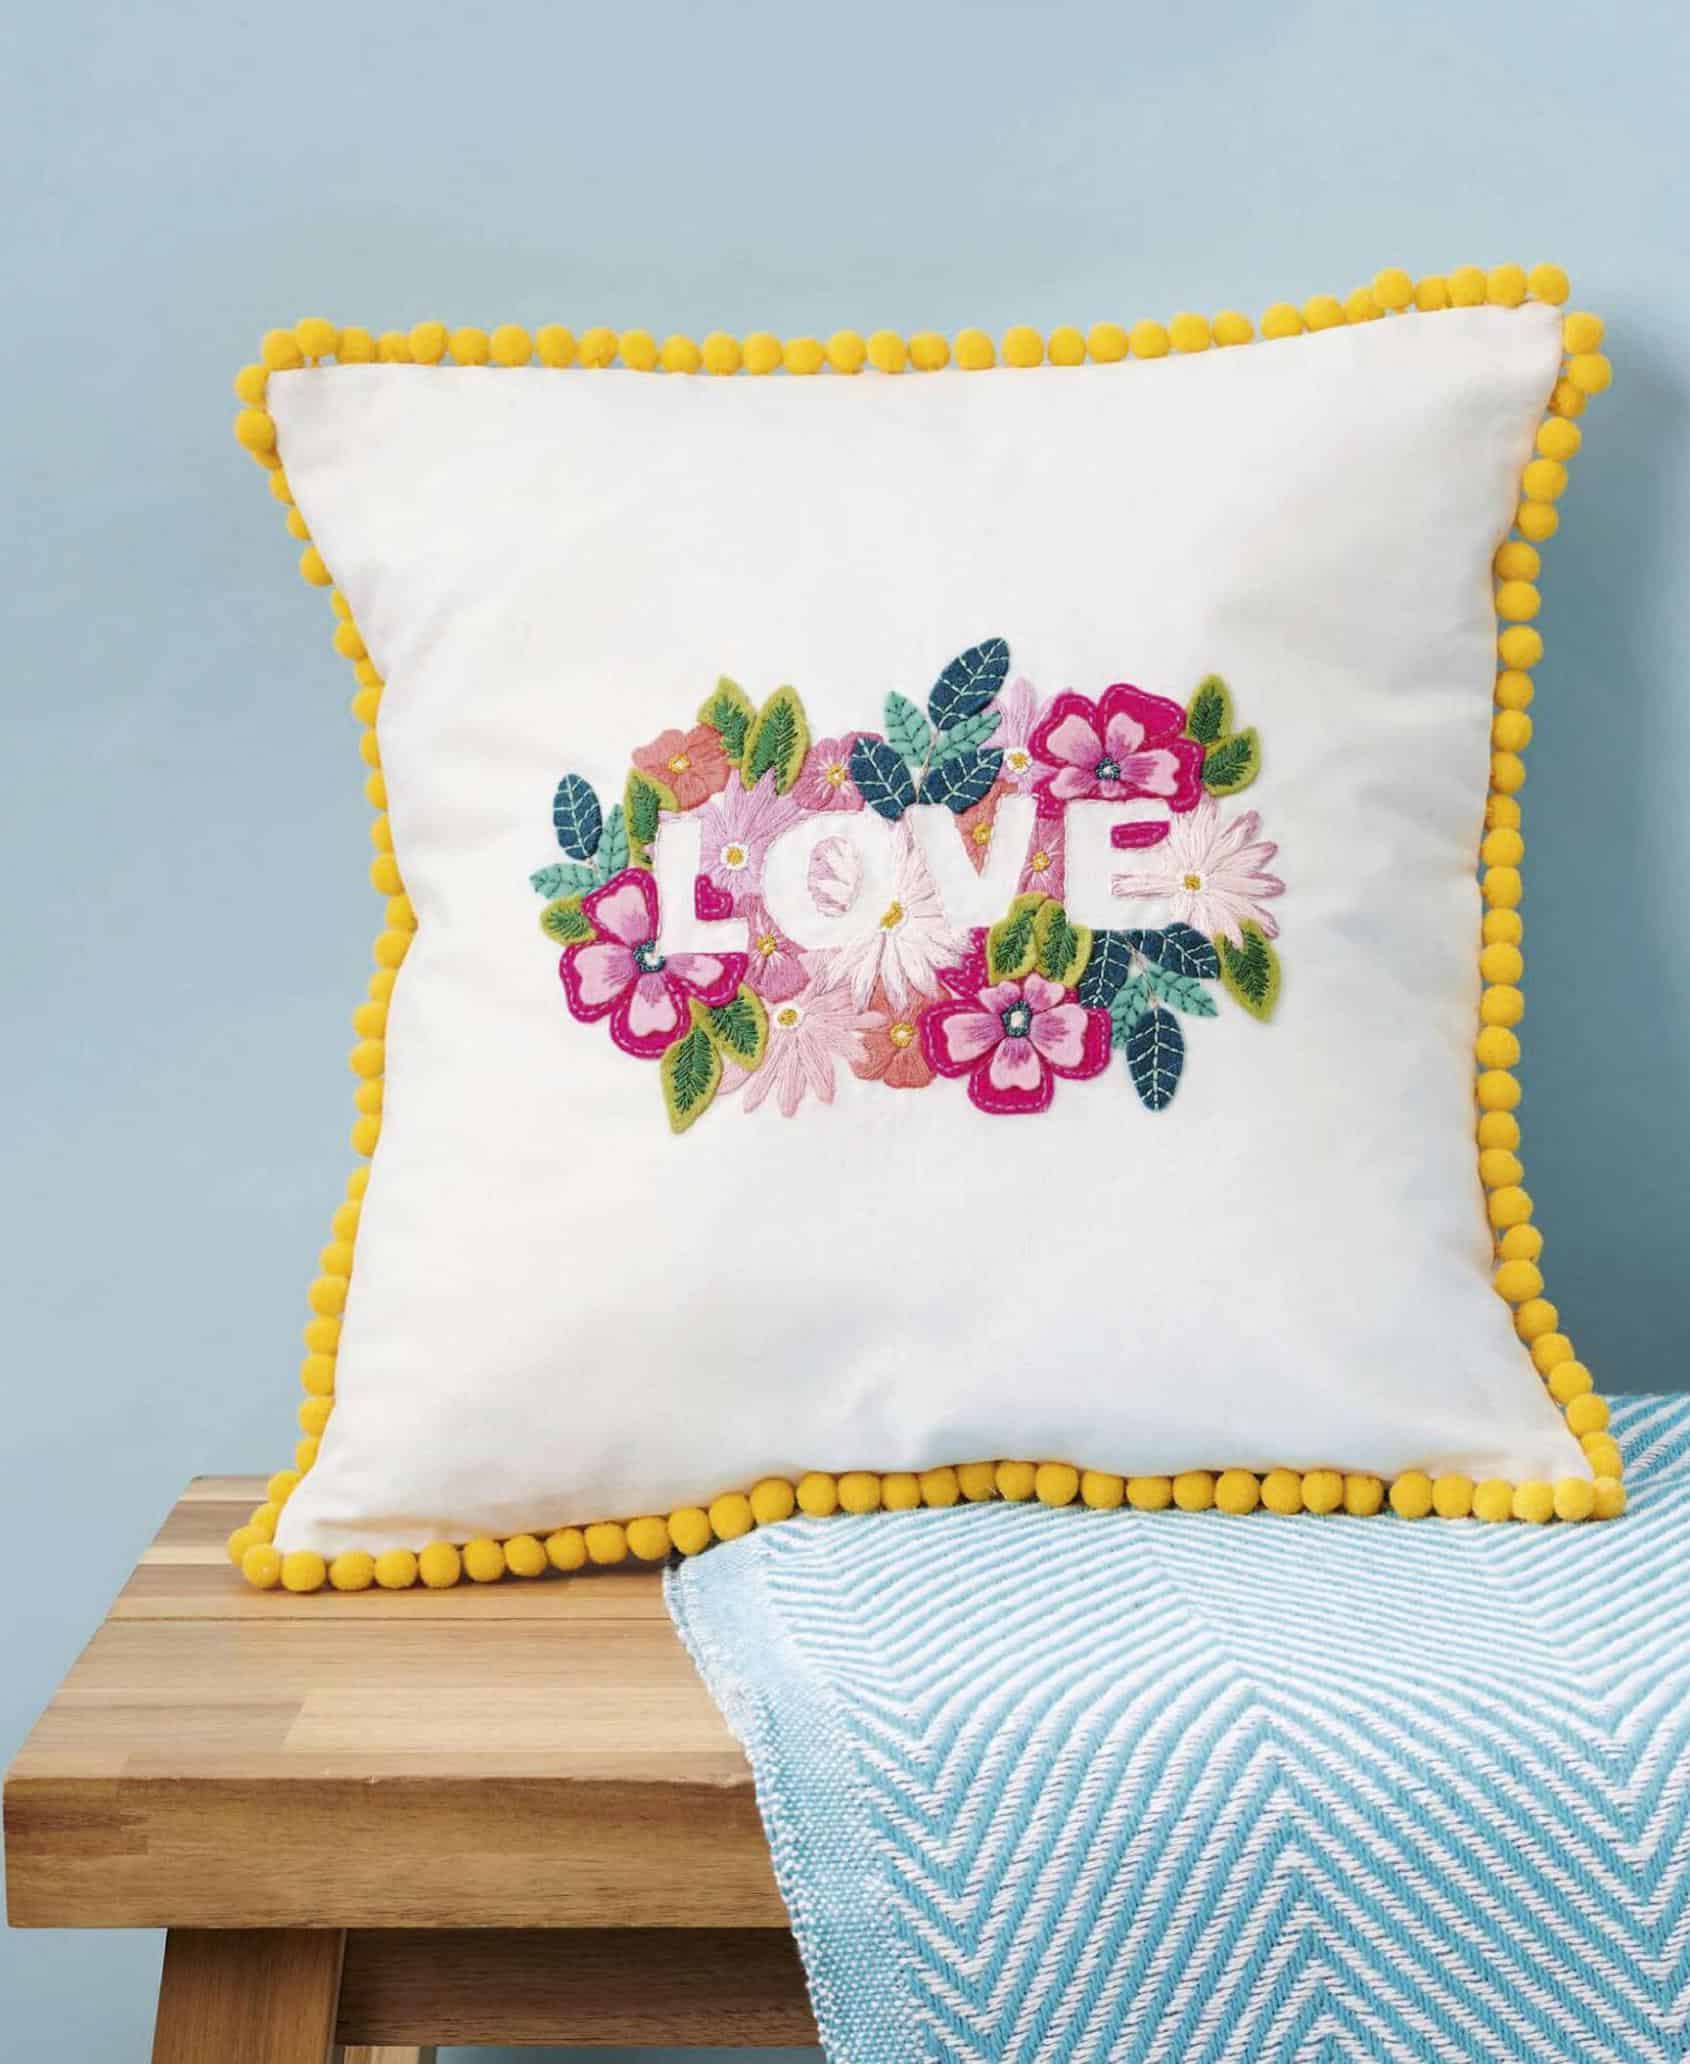
Love-embroidered cushion.
Combine your stitching with felt applique to make this vibrant floral cushion for your home!
Love-embroidered cushion
Materials for Love-embroiderd cushion
Cotton fabric: 92x38cm (cut into 38x38cm, 21x38cm and 33x38cm pieces), light grey
Stranded cotton: see Notes
Felt: teal, turquoise, yellow-green, dark pink and light pink
Medium pom-pom trim: 2m
Cushion inner: 35x35cm
Embroidery hoop: 20cm diameter
Sewing machine with standard foot and zipper foot
Basic embroidery kit
Notes:
Download the template on the link below
RS = right side(s).
DMC Stranded Cotton: 1 skein each of B5200 (white), 07 (brown), 316 (purple), 602 (pink),
892 (light red), 963 {light pink), 3033 (cream), 3607 (plum), 3608 (light plum), 3708 (candy
pink), 3808 (dark teal), 3818 (dark green), 3851 (green) and 3852 (yellow).
Stitches used:
Backstitch, French Knots, Satin Stitch Split Stitch, Straight Stitch
You just need one look at this gorgeous Love-embroiderd cushion to fall head over heels! With vivid shades and a cute pom-pom trim, this cheerful cushion can instantly lift the mood of a room – just pop it on your favourite armchair or use it to brighten up your bedroom. The design combines stitching with applique, a technique that layers felt with embroidery to create a textured piece.

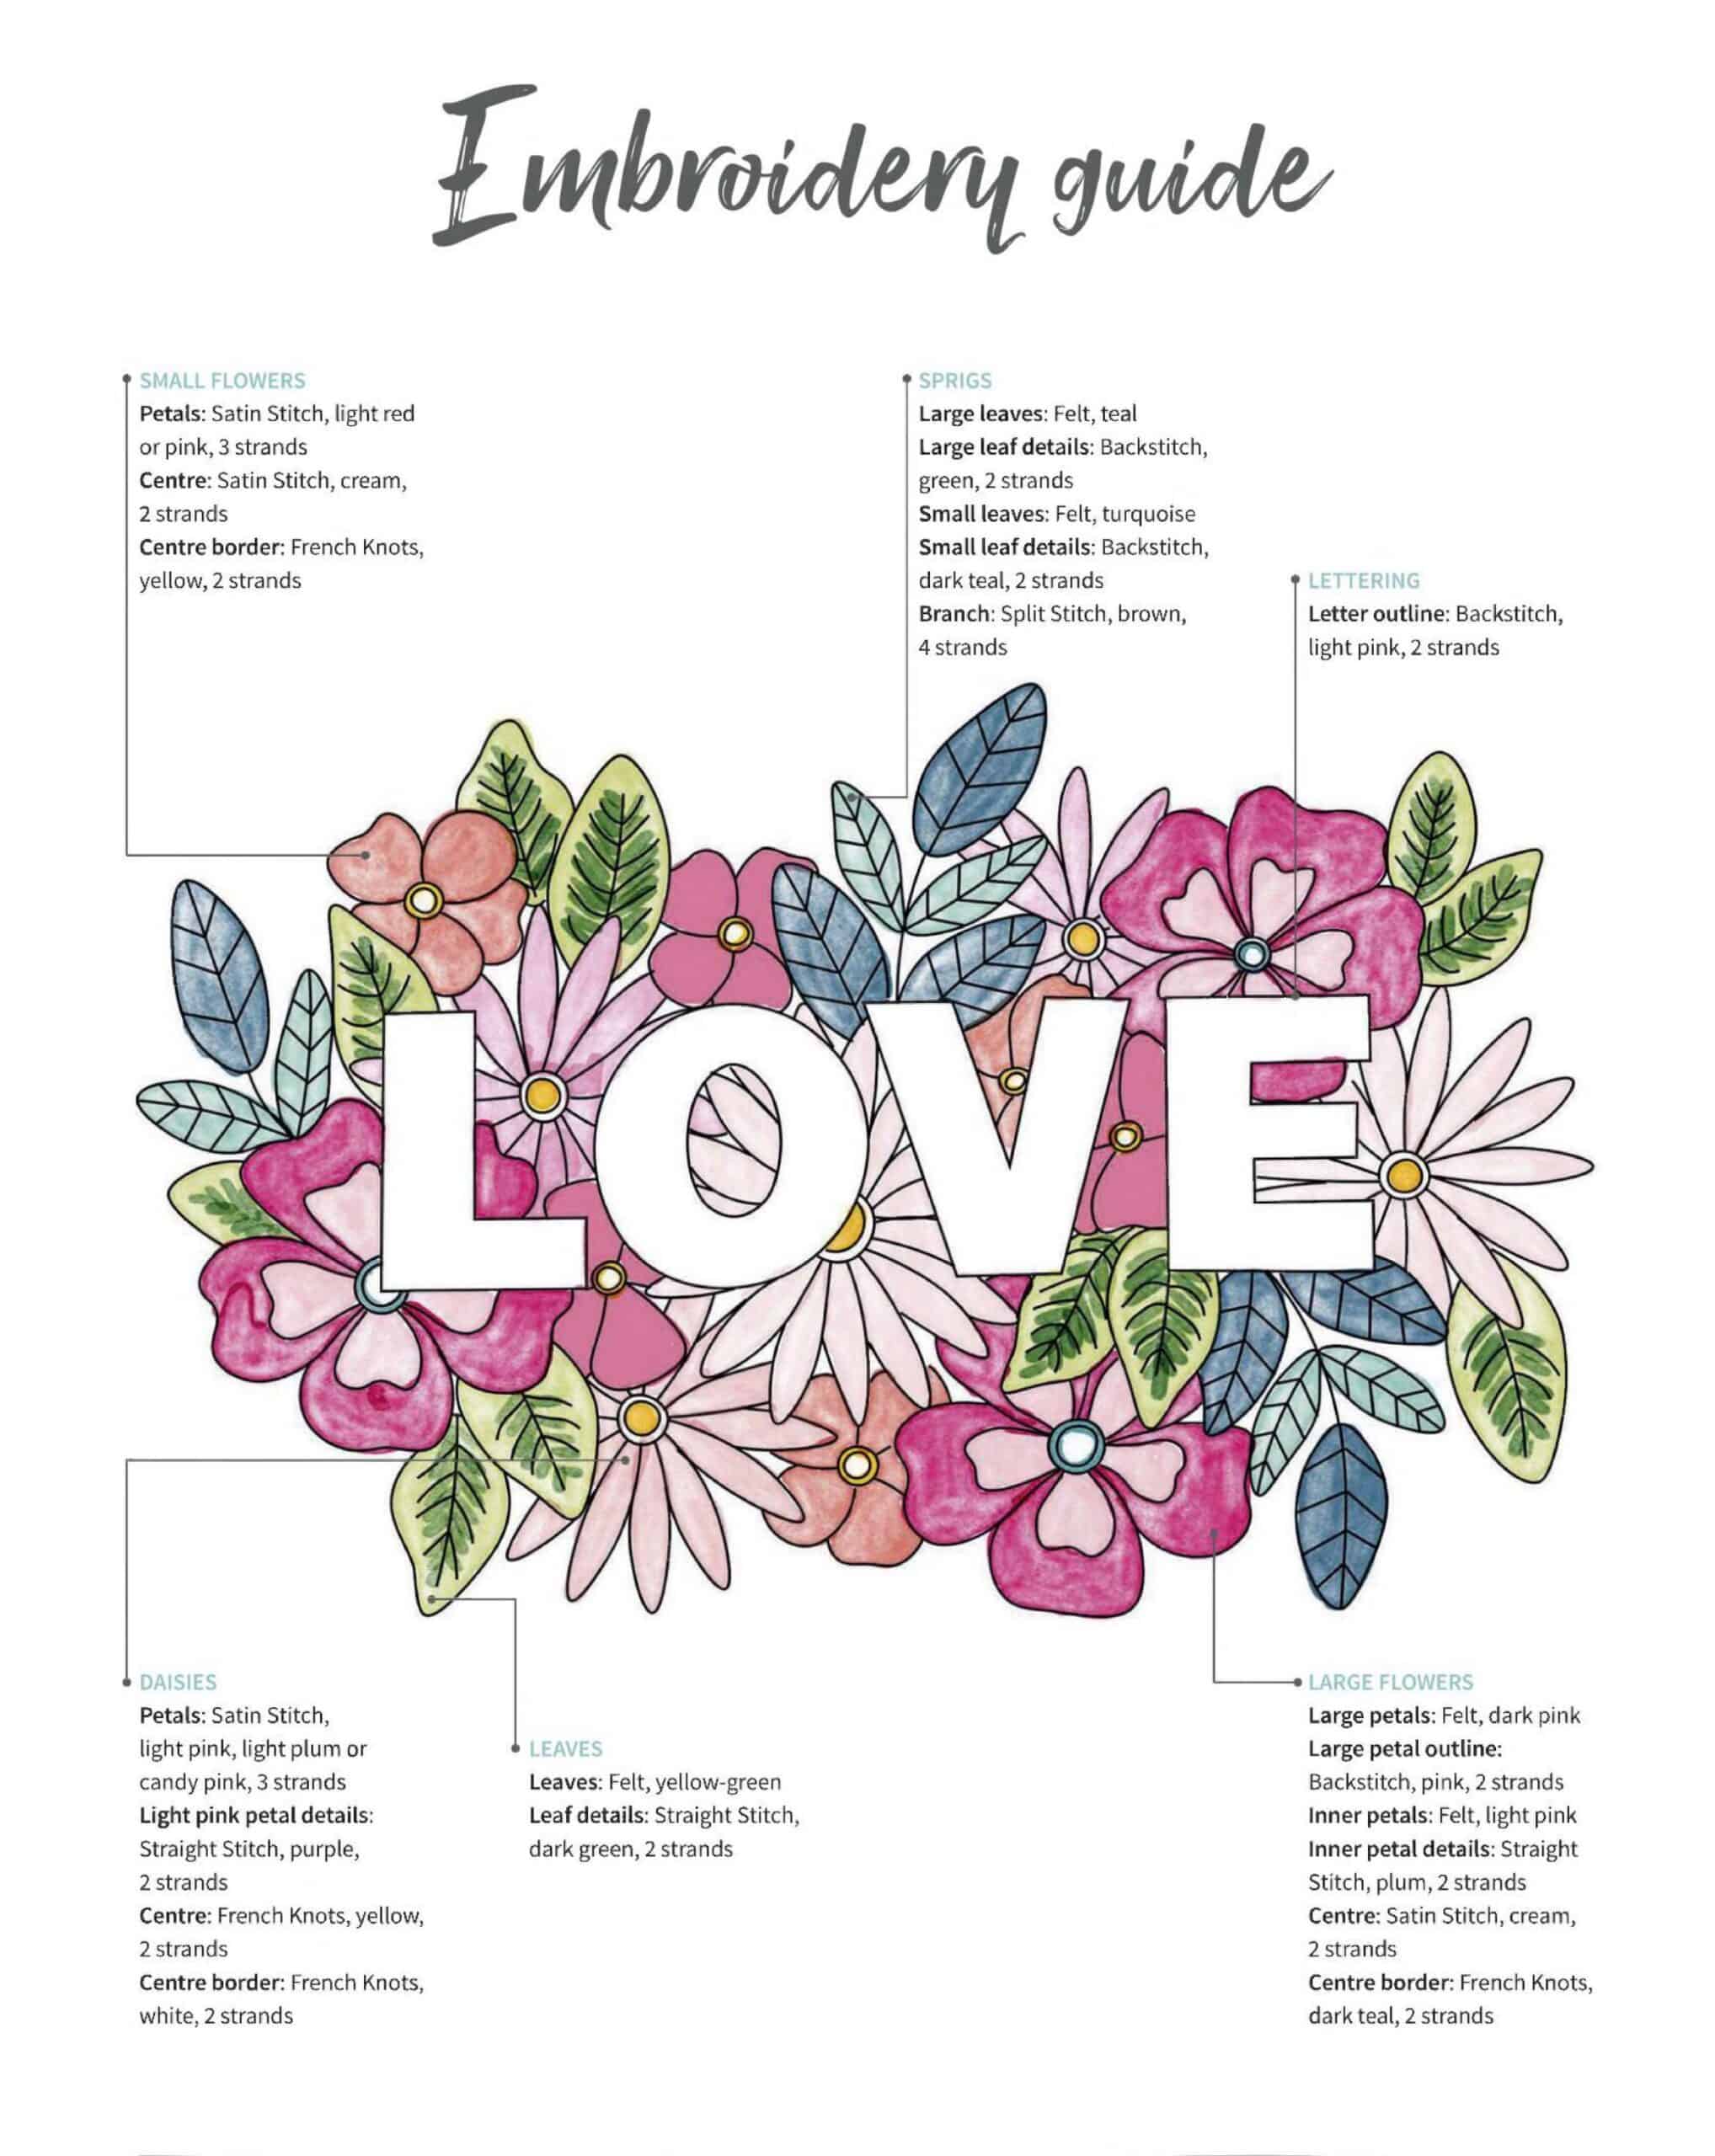
- 1.Transfer the full design onto your 38x38cm cotton fabric panel using your preferred method, being sure to position it centrally. We used a heat erasable pen and a lightbox to trace the template. Mount the fabric in your hoop and pull it taut like a drum. Begin by working the daisy petals in Satin Stitch using three strands of light pink, light plum or candy pink; see the Embroidery Guide below for colour placement. Work the stitches outwards from the centre towards the tip of each petal. For this design, be sure not to trail your threads over the gaps in the stitching where the lettering is as it may show through the fabric from the front.
- 2.The daisy centres are stitched using French Knots in two strands of yellow to fill the centre of the circle and two strands of white to create the border of the circle.
- 3.To make the pattern pieces for this design you will need to cut out sections from the template – be sure to trace out the template onto a piece of paper first and cut that out so you can reuse the template multiple times. When tracing your template pattern pieces onto your felt, turn them upside-down so that when you cut them out and turn them over there won’t be any pen marks on the right sides of your felt.
Cut out the sprig leaves from your template then trace them onto your teal and turquoise felt; refer to the Embroidery Guide for colour placement. Attach the felt to the fabric using Backstitch in two strands of dark teal or green, stitching down the centre of the leaves first and then the veins coming out from the centre. Use green to stitch on the teal felt leaves and dark teal to stitch on the turquoise felt leaves. Your final stitches at the end of each line should be positioned over the edge of the felt going into the fabric. - 4.Make pattern pieces of the large petals from the three large flowers using your template. Don’t cut out the inner petal sections from each large petal as you will be creating texture by layering the felt in the next step. Trace around the pattern piece onto your dark pink felt and cut out. Work a line of Backstitch around each petal, about 3mm in from the edge, using two strands of pink to secure the felt to the fabric.
- 5.Cut out the inner petal pattern pieces for the large flowers. Trace around them onto light pink felt, then cut out and turn over. Position each one on top of the dark pink felt petals. Use two strands of plum to work Straight Stitches from the bottom of the petals towards their centre to secure the felt in place, stitching through all the layers. Work 7-9 of these Straight Stitches in varying lengths for each petal.
- 6.From the template, cut out the rest of the leaves and trace around them on the yellow-green felt. Cut out and position each leaf. Use two strands of dark green to work single Straight Stitches from the centre of the
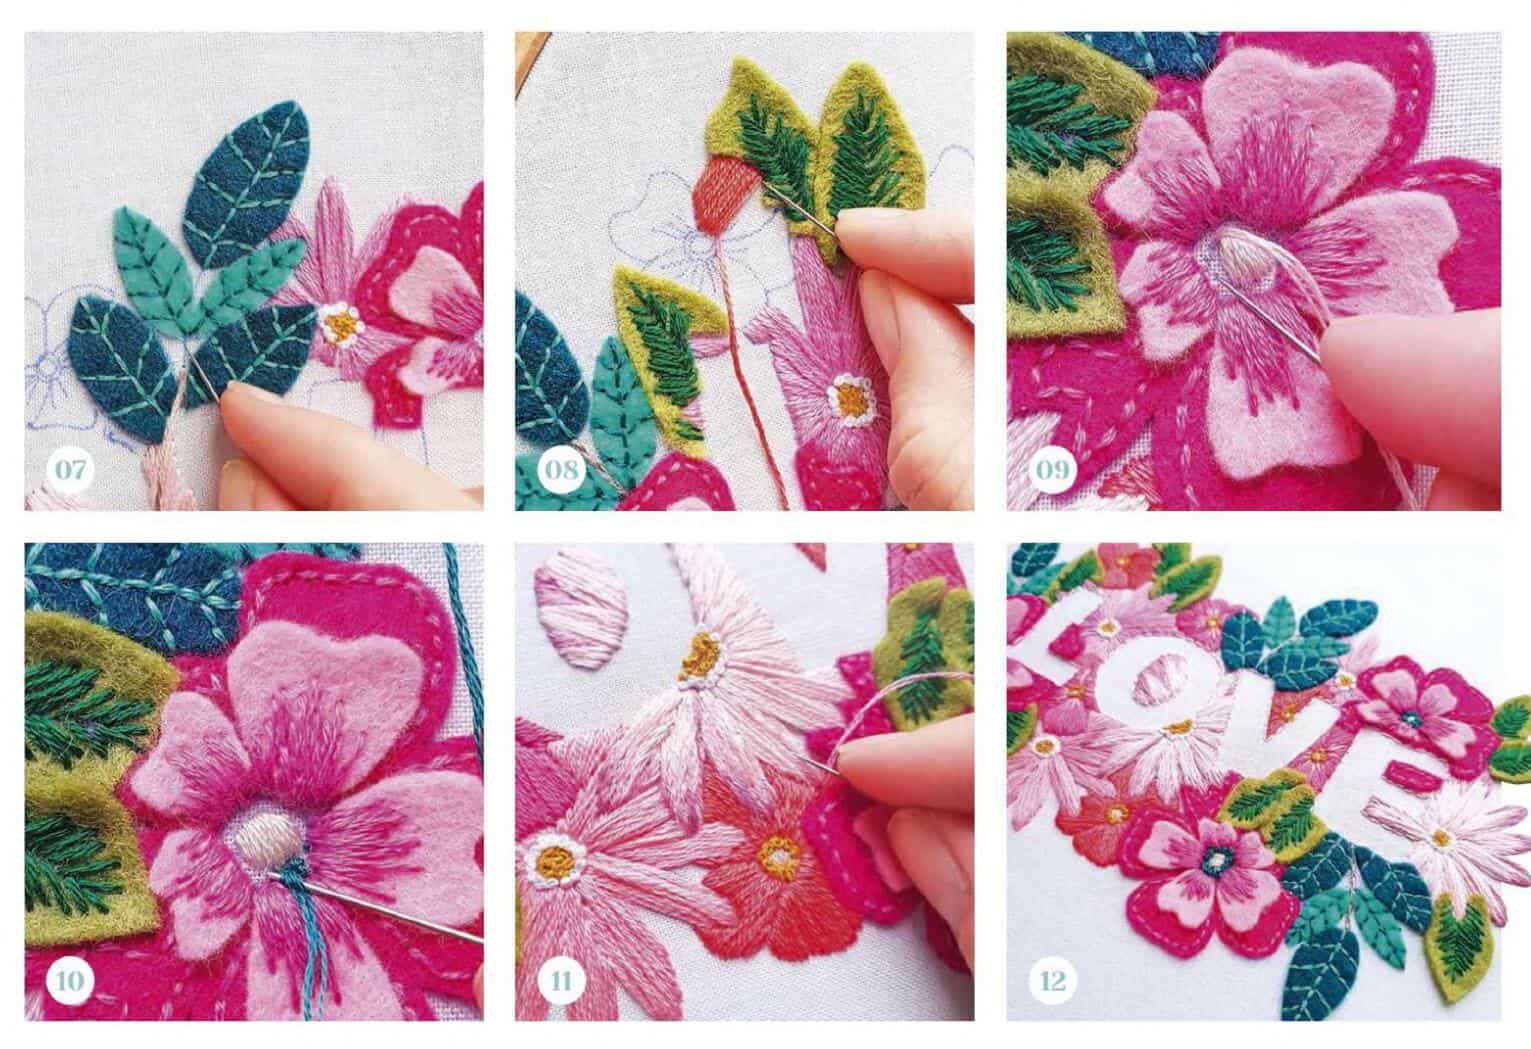
leaves halfway towards the outside edge. Start with a few stitches to secure the felt to the fabric and then fill in the gaps to achieve your desired density. You may find it easier to draw a line down the centre first as a guide. - 7.For the sprig branches, work in Split Stitch using four strands of brown.
- 8.Work the petals of the small flowers in Satin Stitch using three strands of light red or pink. Refer to the Embroidery Guide for colour placement.
- 9.Work Satin Stitch to fill the inside of the centre circles for the large felt flowers and the small light red and pink flowers using two strands of cream.
- 10.Use two strands of dark teal or yellow to outline the centre of the flowers with a ring of French Knots. Work each French Knot closely together for a continuous line.
- 12.11.Add extra detail to the light pink daisies by adding some Straight Stitches in two strands of purple to the tips of each petal. Blend your stitches into the ones below by varying the length of the Straight Stitches when overlapping the colours to create a subtle shade transition.
- 13.Finish off the stitching by adding a neat Backstitch outline around each of the letter shapes using two strands of light pink.
- 14.Remove your fabric from the hoop. Press your stitching by placing it face down onto a clean white towel, which will protect the stitching and felt from being squashed during the ironing process. Be sure to iron onto the back of the fabric using a low heat.
MAKING THE Love-embroiderd cushion
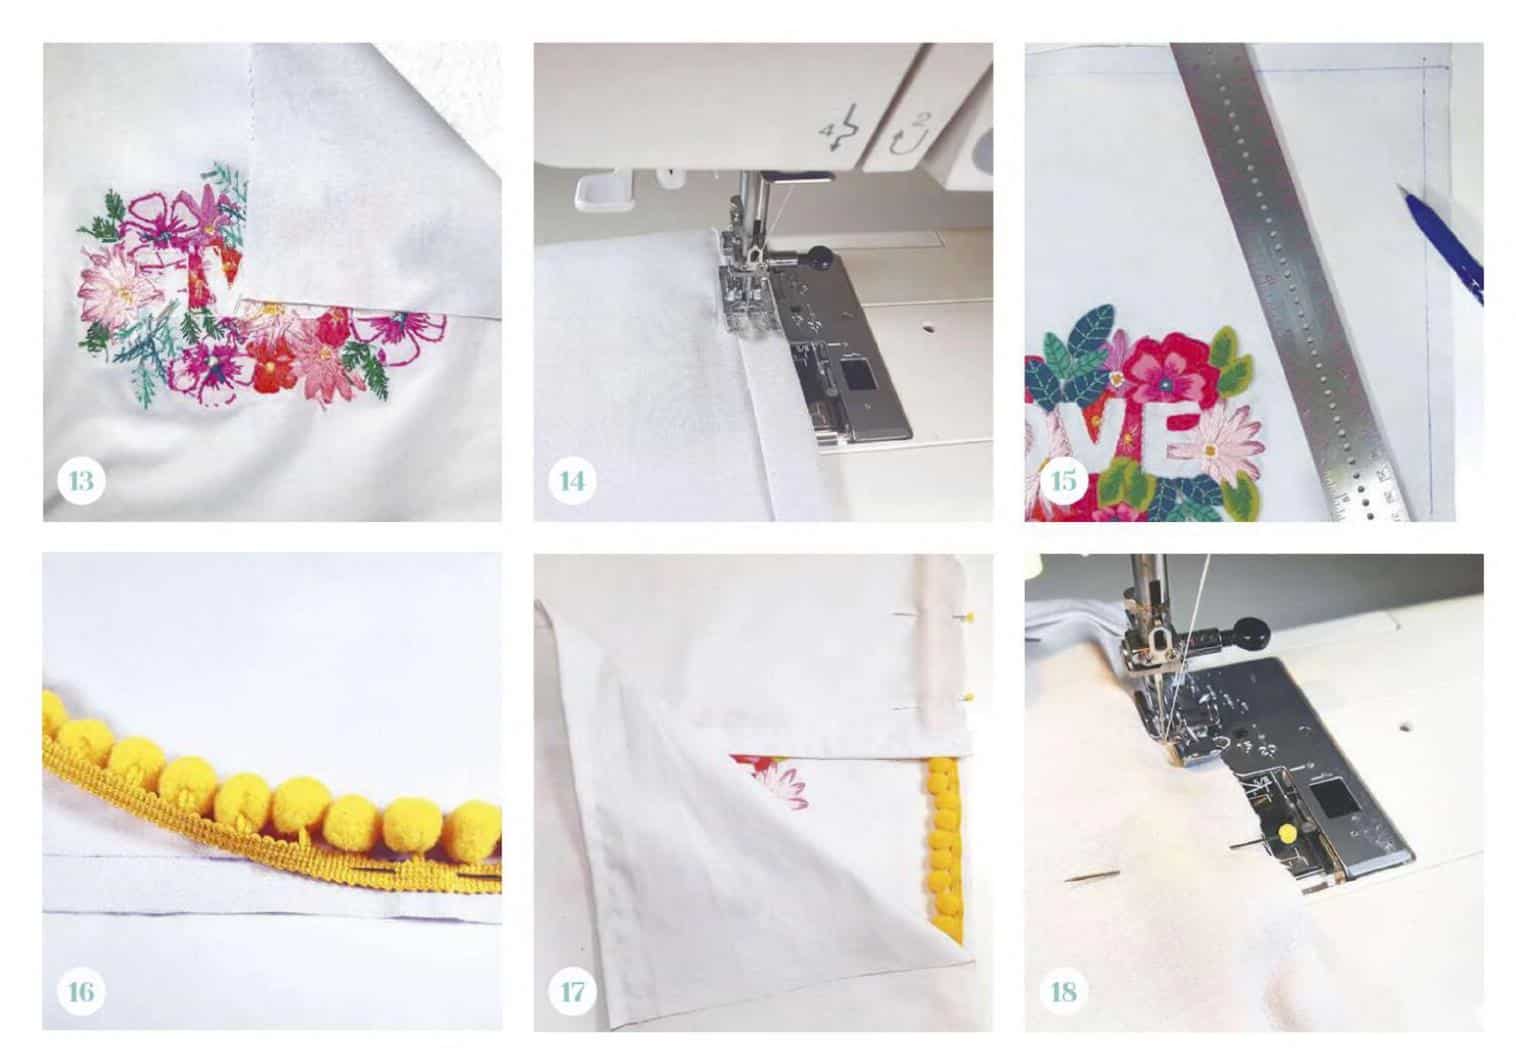
- Take the 21x38cm and the 33x38cm fabric panels and fold and press a 1cm double hem along one long edge of each. To do this, simply fold the edge over by 1cm, press and then repeat this process so that the raw edge
of the fabric is concealed within the fold. Machine stitch in place using a standard foot and straight stitches. These edges will be the opening at the back of the cushion. - Using an erasable pen, mark out a 1cm seam around the outside edge on the RS of the fabric. This mark may be visible after assembly so needs to be fully erasable.
- Tack or pin your pom-pom trim onto the RS of your stitched piece, with the braid inside the seam and the pom-poms sitting inside the marked square. With the right sides facing each other, place the smaller panel at the top of the front cushion panel and the larger one at the bottom, so that the two seam edges overlap each other. Pin both of the panels in place, paying extra attention to the corners as the pom-poms can be very bulky in these areas.
- Switch to the zipper foot on your sewing machine and sew all the way around the edge of the cushion, using a 1cm seam allowance. Take care not to trap any of the pom-poms in your seam – they might move around as you sew. Trim the corners, then turn through to the RS and press the seams. The envelope style of this cushion
cover means you don’t need to attach press studs or use buttons. When choosing a cushion inner to go inside your cover we recommend a 35x35cm standard inner. However, if you prefer a plumper look, you
could use a 40x40cm inner instead.
Designed by GEORGIE EMERY .
Download the template for embroidered cushion Love:
DownloadSee also embroidery design “Angels” for pillow


