How to Make a Birthday Banner with Machine Embroidery and Appliqué — Complete Sewing Tutorial

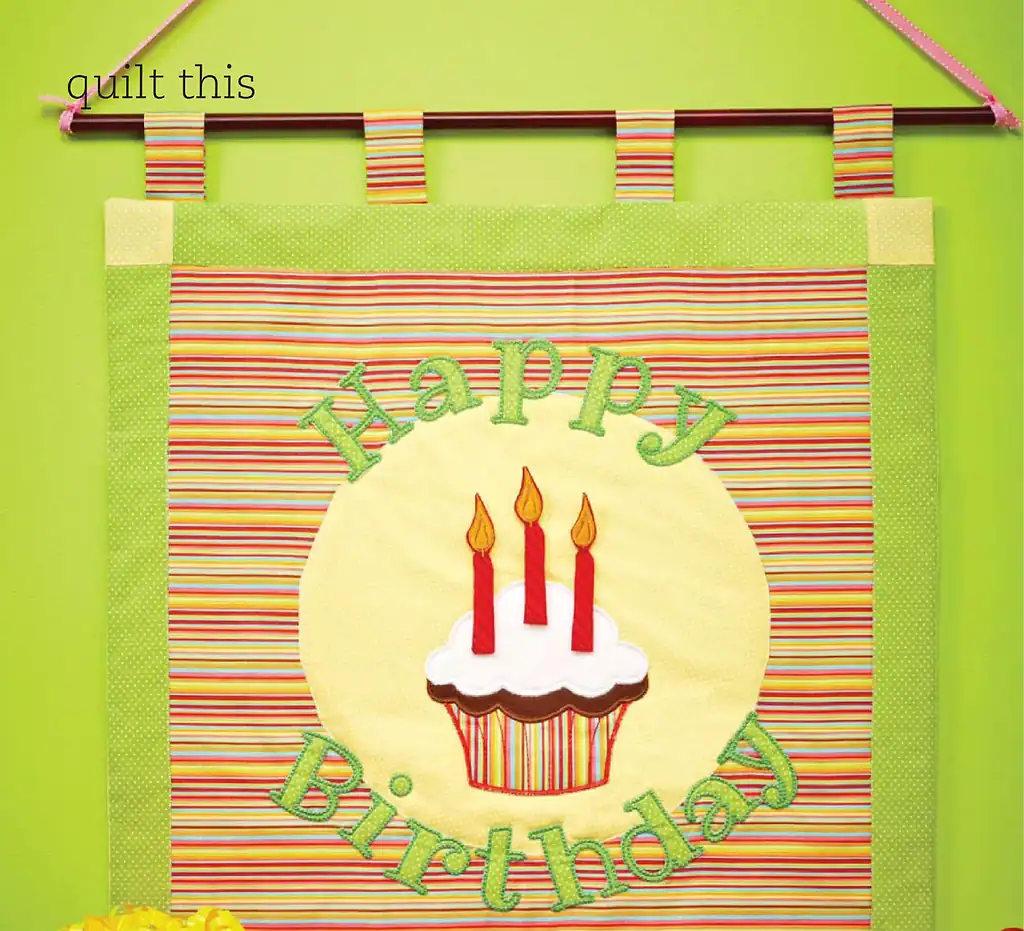
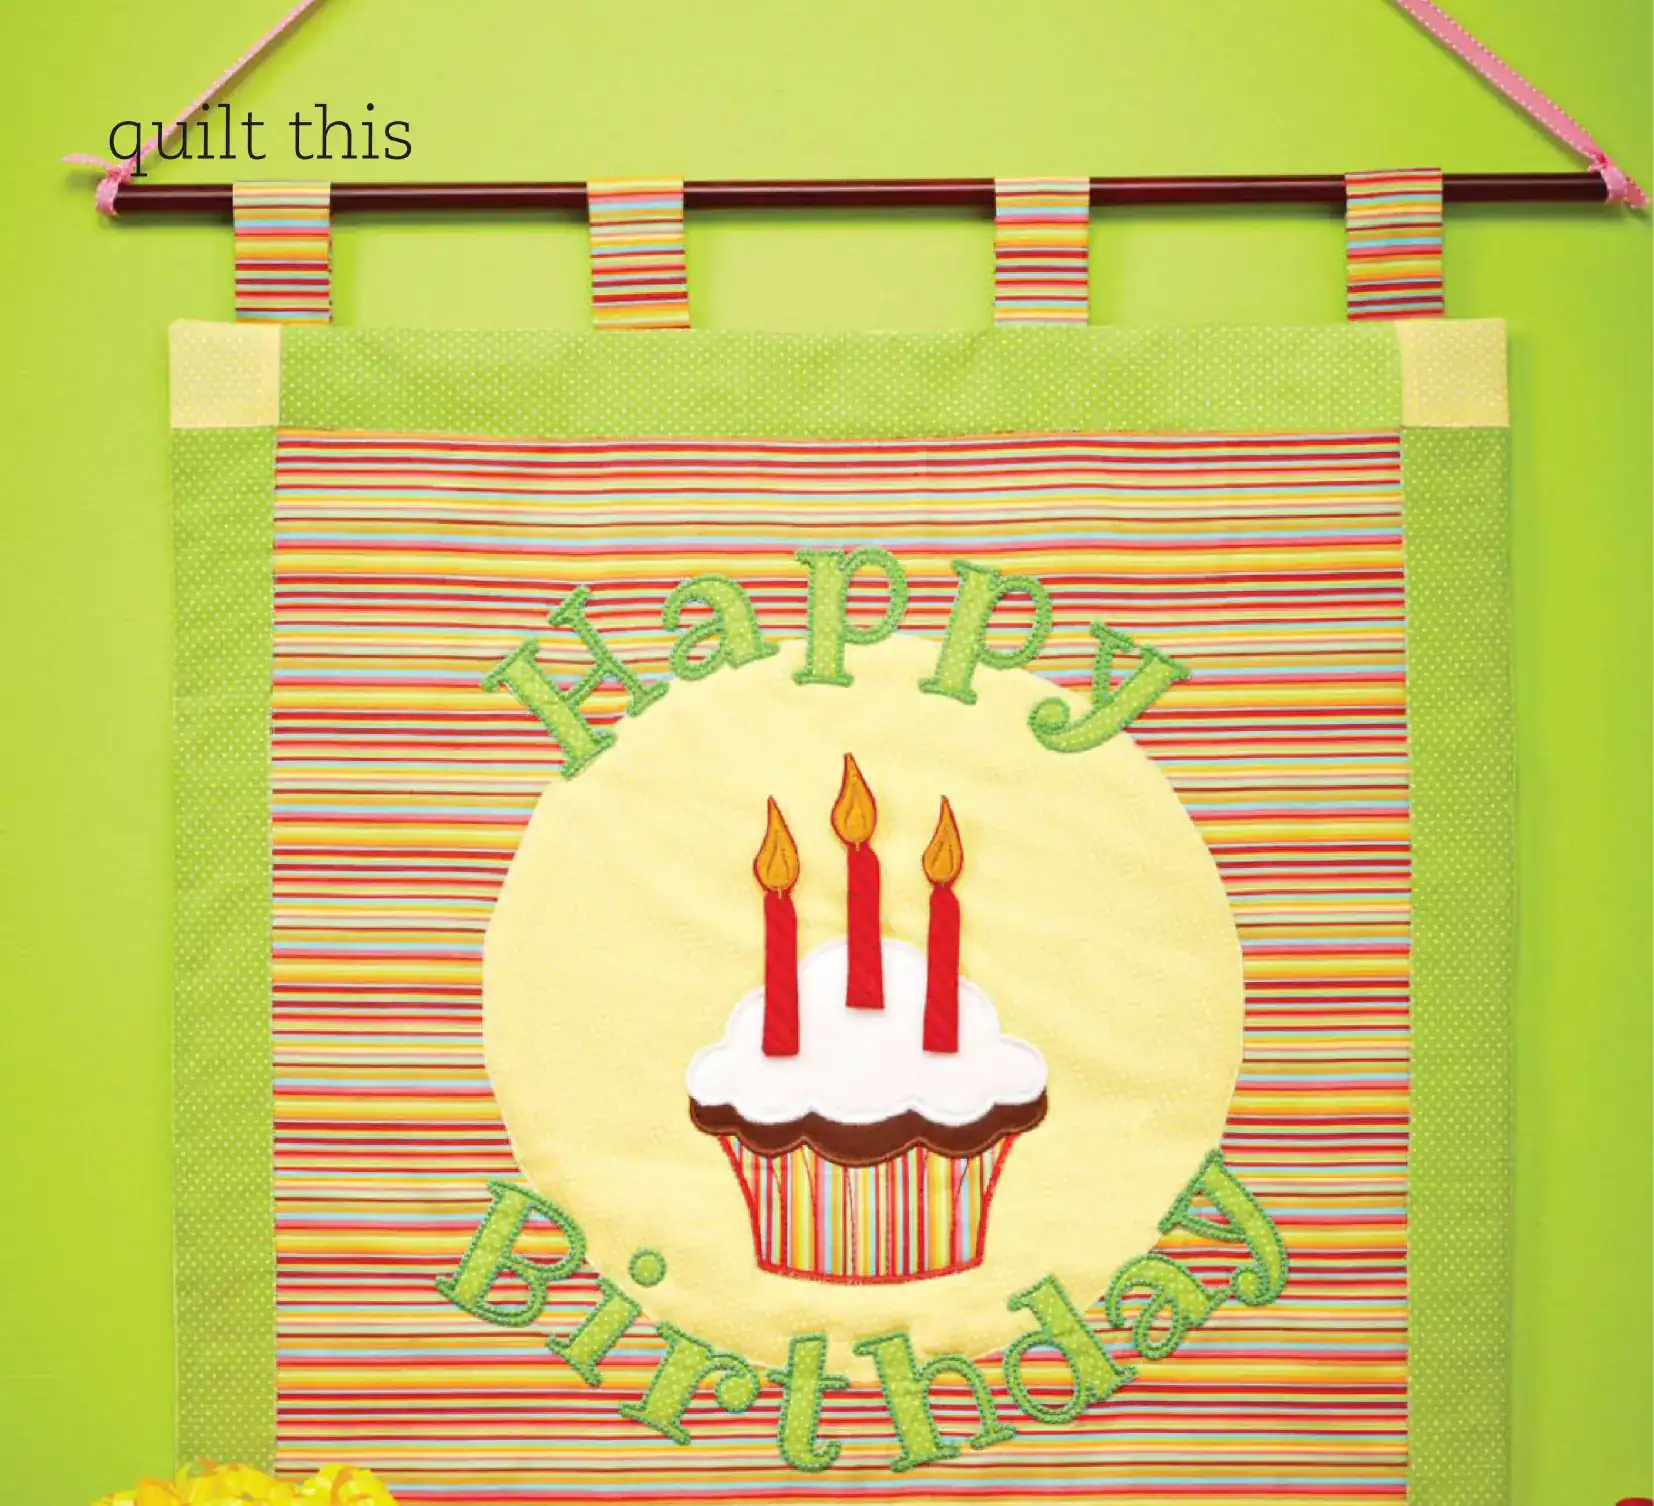
Quick answer: Make a reusable textile banner approximately 19½ × 20 inches (49.5 × 50.8 cm), decorate a 14-inch (35.6 cm) fabric circle with a cupcake and birthday lettering, then attach removable embroidered candles with hook-and-loop tape. Finish the banner with a pieced border, hanging tabs, backing and lightweight batting.

Introduction

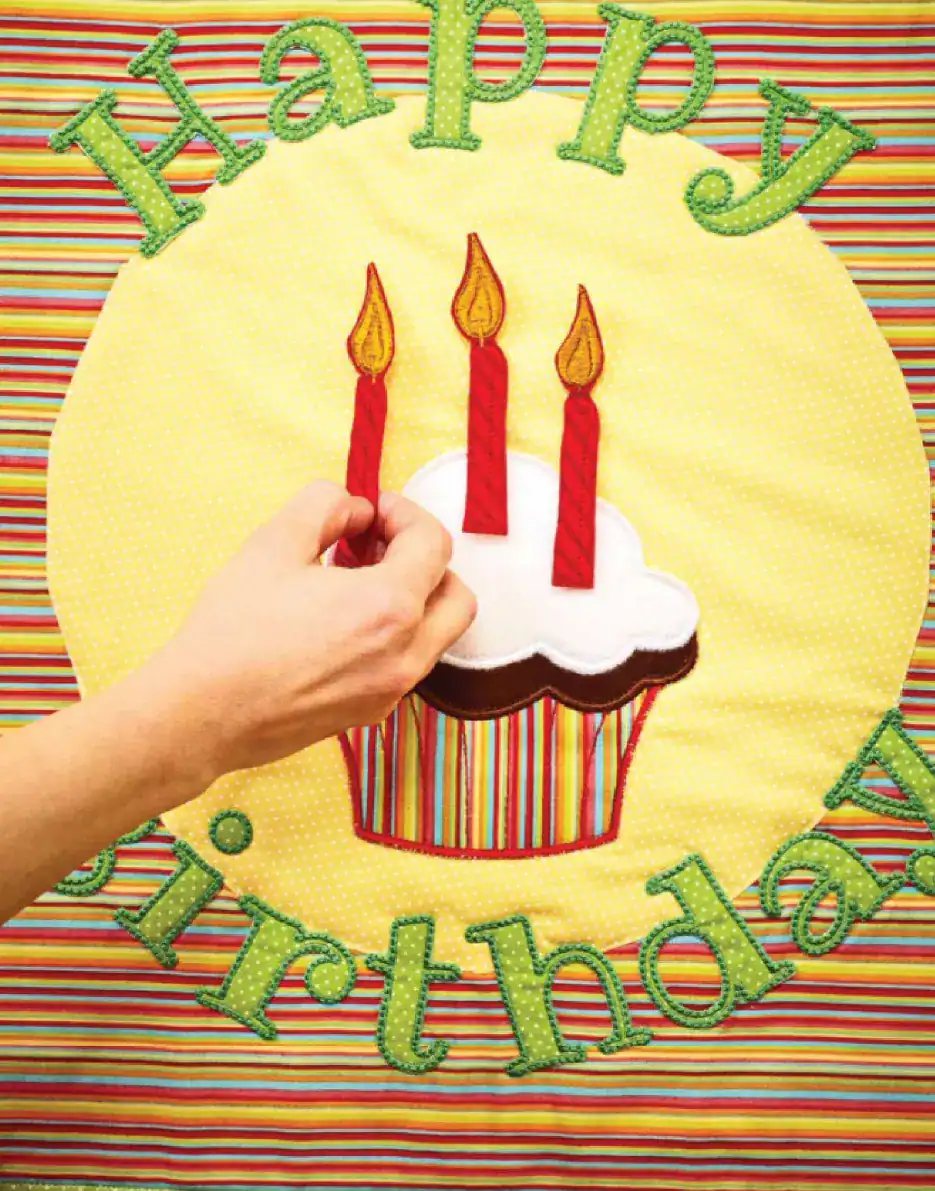
This reusable birthday wall hanging combines three approachable textile techniques: machine embroidery, fabric appliqué and quilt-style construction. The centerpiece is a large appliquéd cupcake surrounded by birthday lettering. The candles are separate fabric pieces that attach to the banner with hook-and-loop tape, so the decoration can be updated every year.

Finished project

•Type: reusable textile banner or wall hanging.
•Finished size: about 19½ × 20 inches (49.5 × 50.8 cm), not including hanging tabs.
•Main techniques: machine appliqué, embroidered lettering, pieced border and light quilting.
•Feature: removable fabric candles on hook-and-loop tape.
•Skill level: confident beginner to intermediate; a sewing-and-embroidery machine is recommended.
•Estimated time: 4–8 hours, excluding design preparation and breaks.

Materials

Material

Quantity

Use

Striped cotton fabric

1 yard / about 91 cm

Front panel and hanging tabs

Large coordinating cotton

1½ yards / about 1.37 m

Center circle, backing and border corners

Small coordinating cotton

½ yard / about 46 cm

Pocket and border strips

Red felt

project-size scrap

Candle appliqués

White felt

4 × 7 in / about 10 × 18 cm

Candle base

Brown cotton scrap

small piece

Cupcake detail

Lightweight batting

22 × 22½ in / 56 × 57 cm

Soft inner layer

½-inch hook-and-loop tape

10 in / about 25 cm

Removable candles

Cut-away and fusible cut-away stabilizer

as needed

Embroidery support

Embroidery and all-purpose thread

as needed

Stitching

Hand-sewing needle

1

Closing the turning opening

Tools and embroidery files

Prepare an embroidery machine with hoop(s), rotary cutter and ruler, fabric scissors, iron, pins, fabric marker, and a 13½-inch (34.3 cm) circle template made from wax paper or paper.
You will need three designs: a cupcake appliqué about 6 × 6 inches (15 × 15 cm), a candle design about ¾ × 4¼ inches (1.9 × 10.8 cm), and an appliqué alphabet about 2¾ inches (7 cm) high. Convert the files to the format supported by your machine and test each design on scrap fabric before stitching the project.
How to Make a Birthday Banner with Machine Embroidery and Appliqué — Complete Sewing Tutorial

Cutting list

1.From striped cotton, cut one 19½ × 20-inch (49.5 × 50.8 cm) front rectangle and four 4 × 6-inch (10 × 15 cm) rectangles for hanging tabs.
2.From the large coordinating cotton, cut one 14-inch (35.6 cm) circle, one 23½ × 23½-inch (59.7 × 59.7 cm) backing rectangle and four 2½-inch (6.4 cm) squares for border corners.
3.From the small coordinating cotton, cut one 6 × 9-inch (15 × 23 cm) pocket, two 2½ × 20-inch (6.4 × 50.8 cm) strips and two 2½ × 19½-inch (6.4 × 49.5 cm) strips.
4.Leave enough fabric around each embroidered appliqué to trim safely after the tack-down stitch. Use a ¼-inch (6 mm) seam allowance unless a step says otherwise.
How to Make a Birthday Banner with Machine Embroidery and Appliqué — Complete Sewing Tutorial

Step 1: Embroider the cupcake appliqué
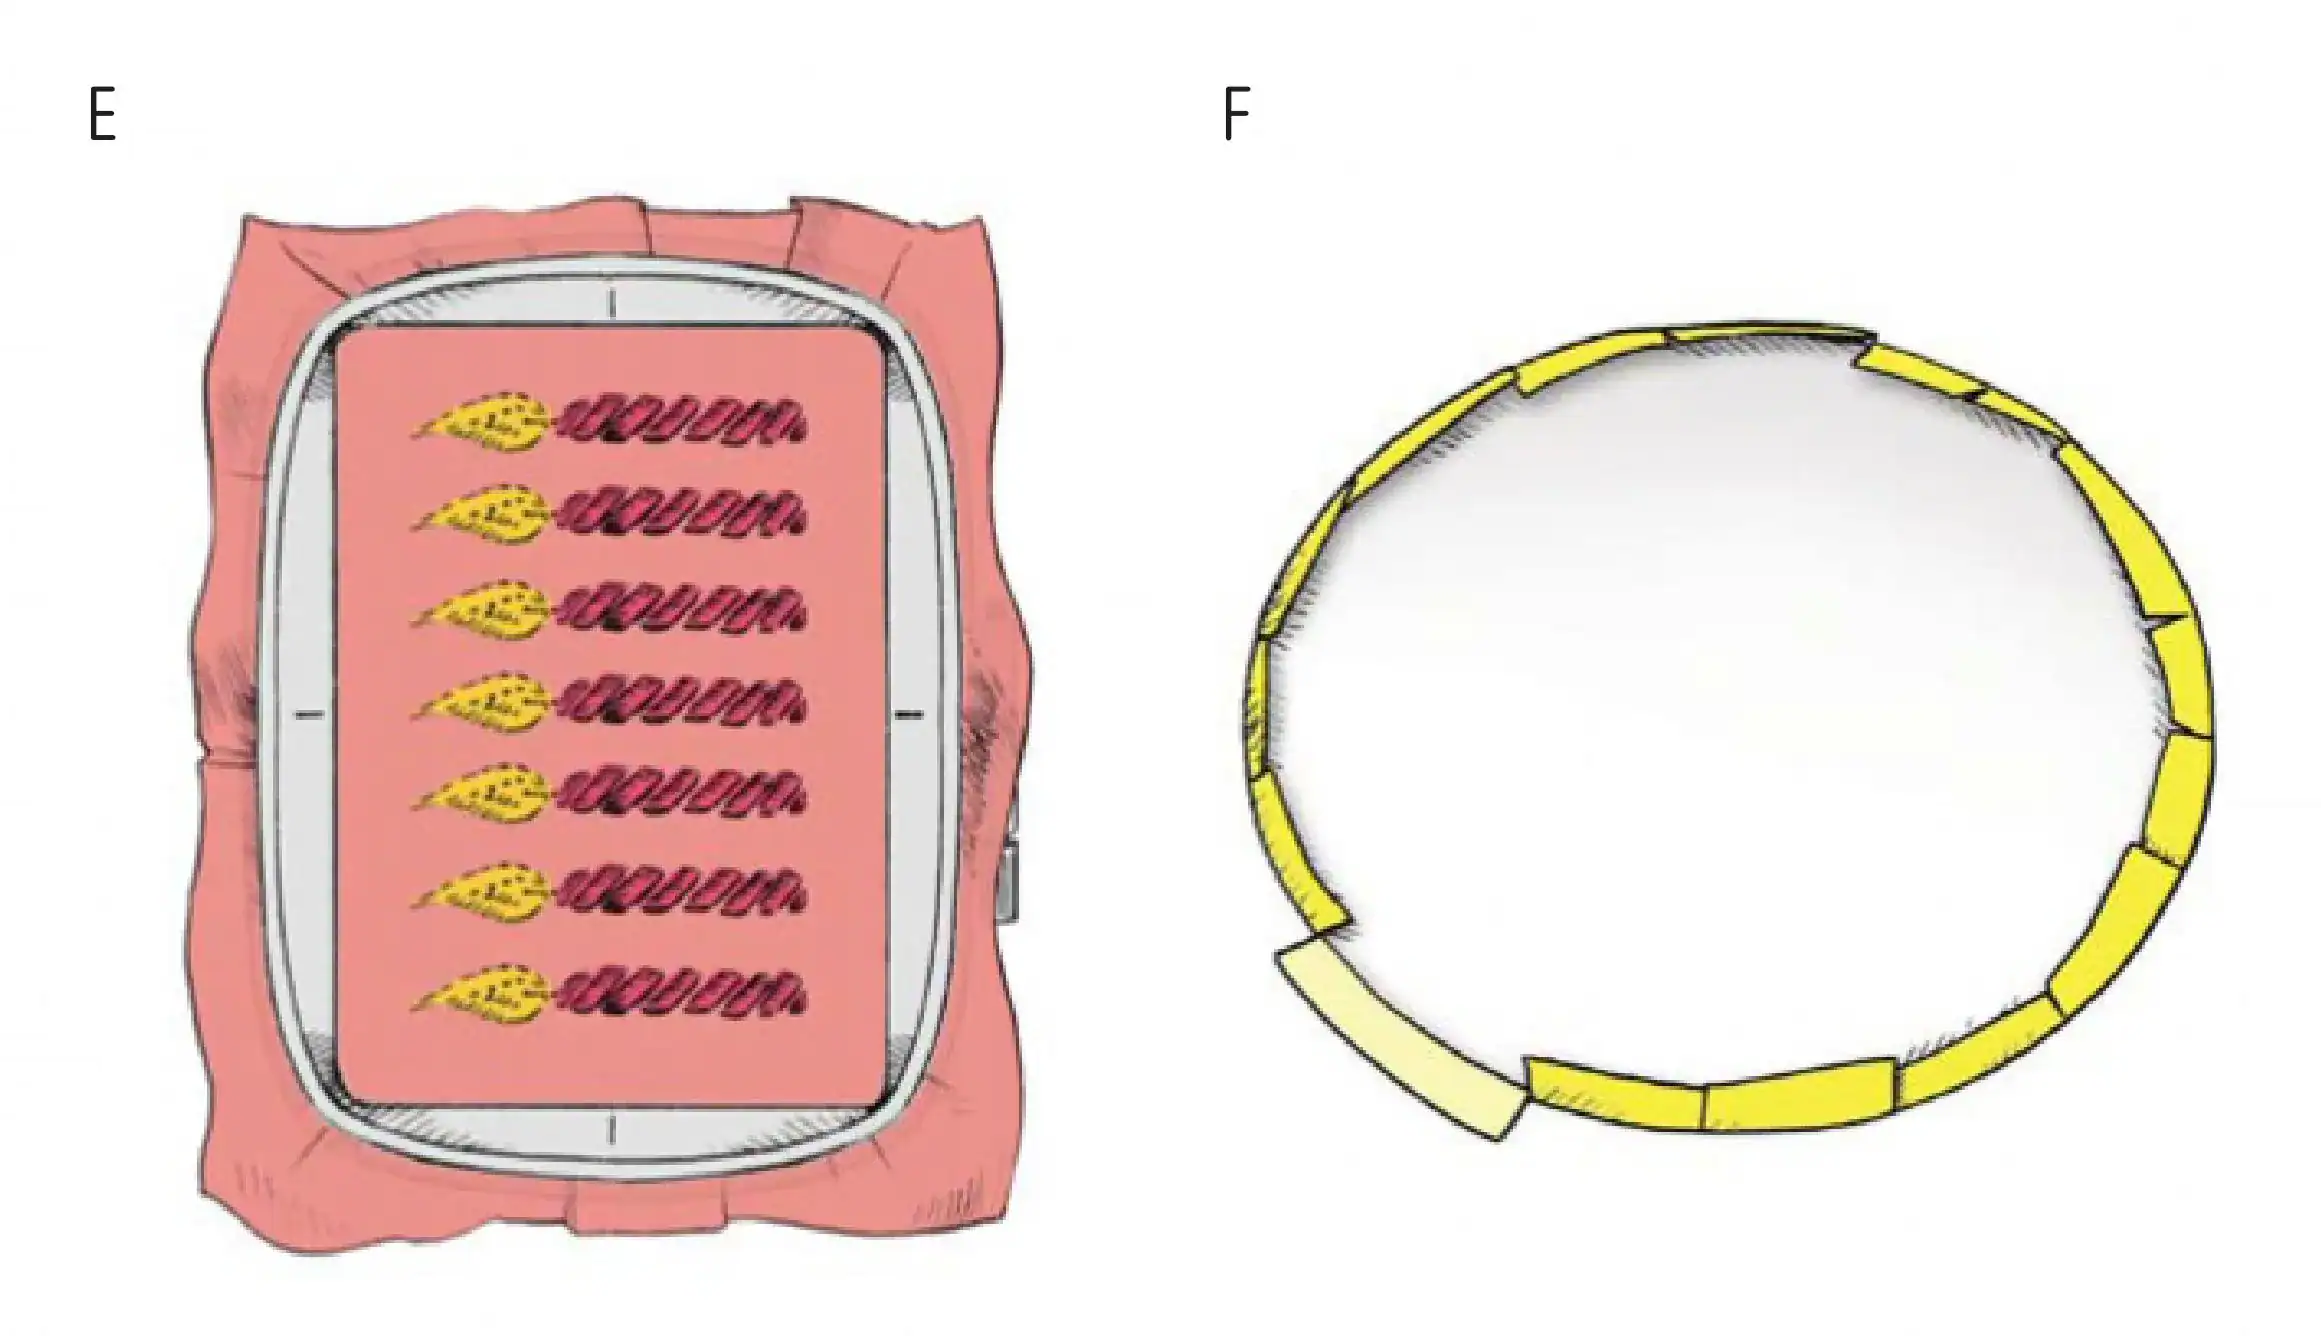
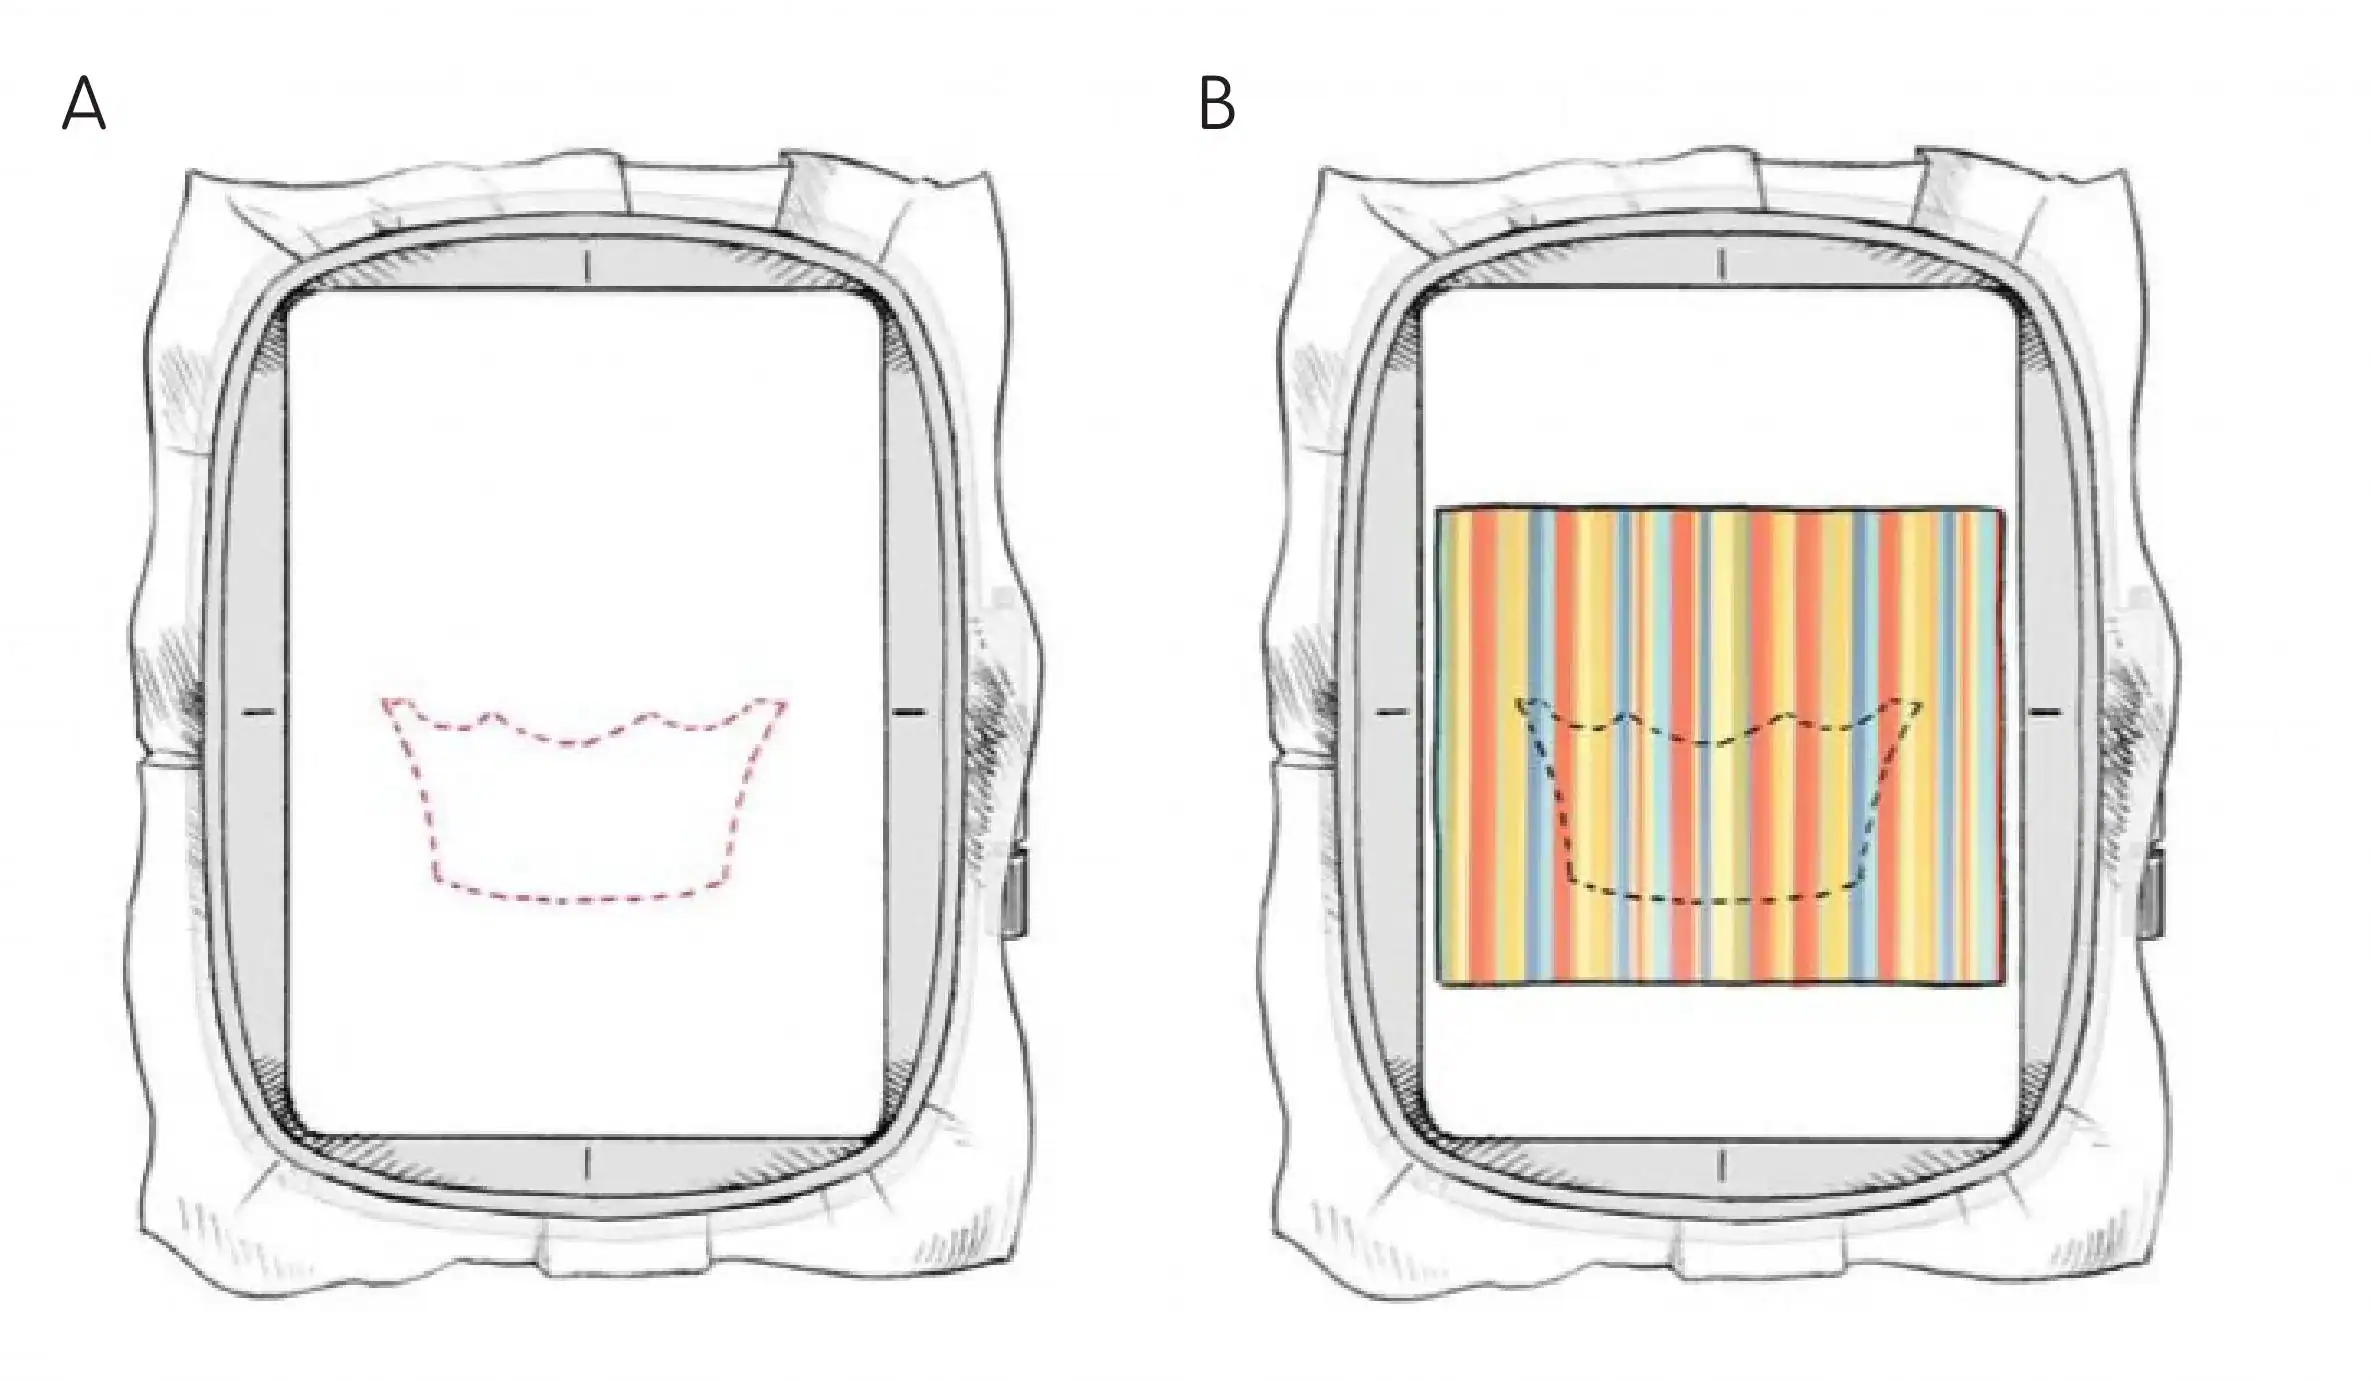
1.Load the cupcake appliqué file. Thread the machine needle with coordinating embroidery thread and the bobbin with bobbin thread.
2.Hoop cut-away stabilizer and stitch the placement outline.
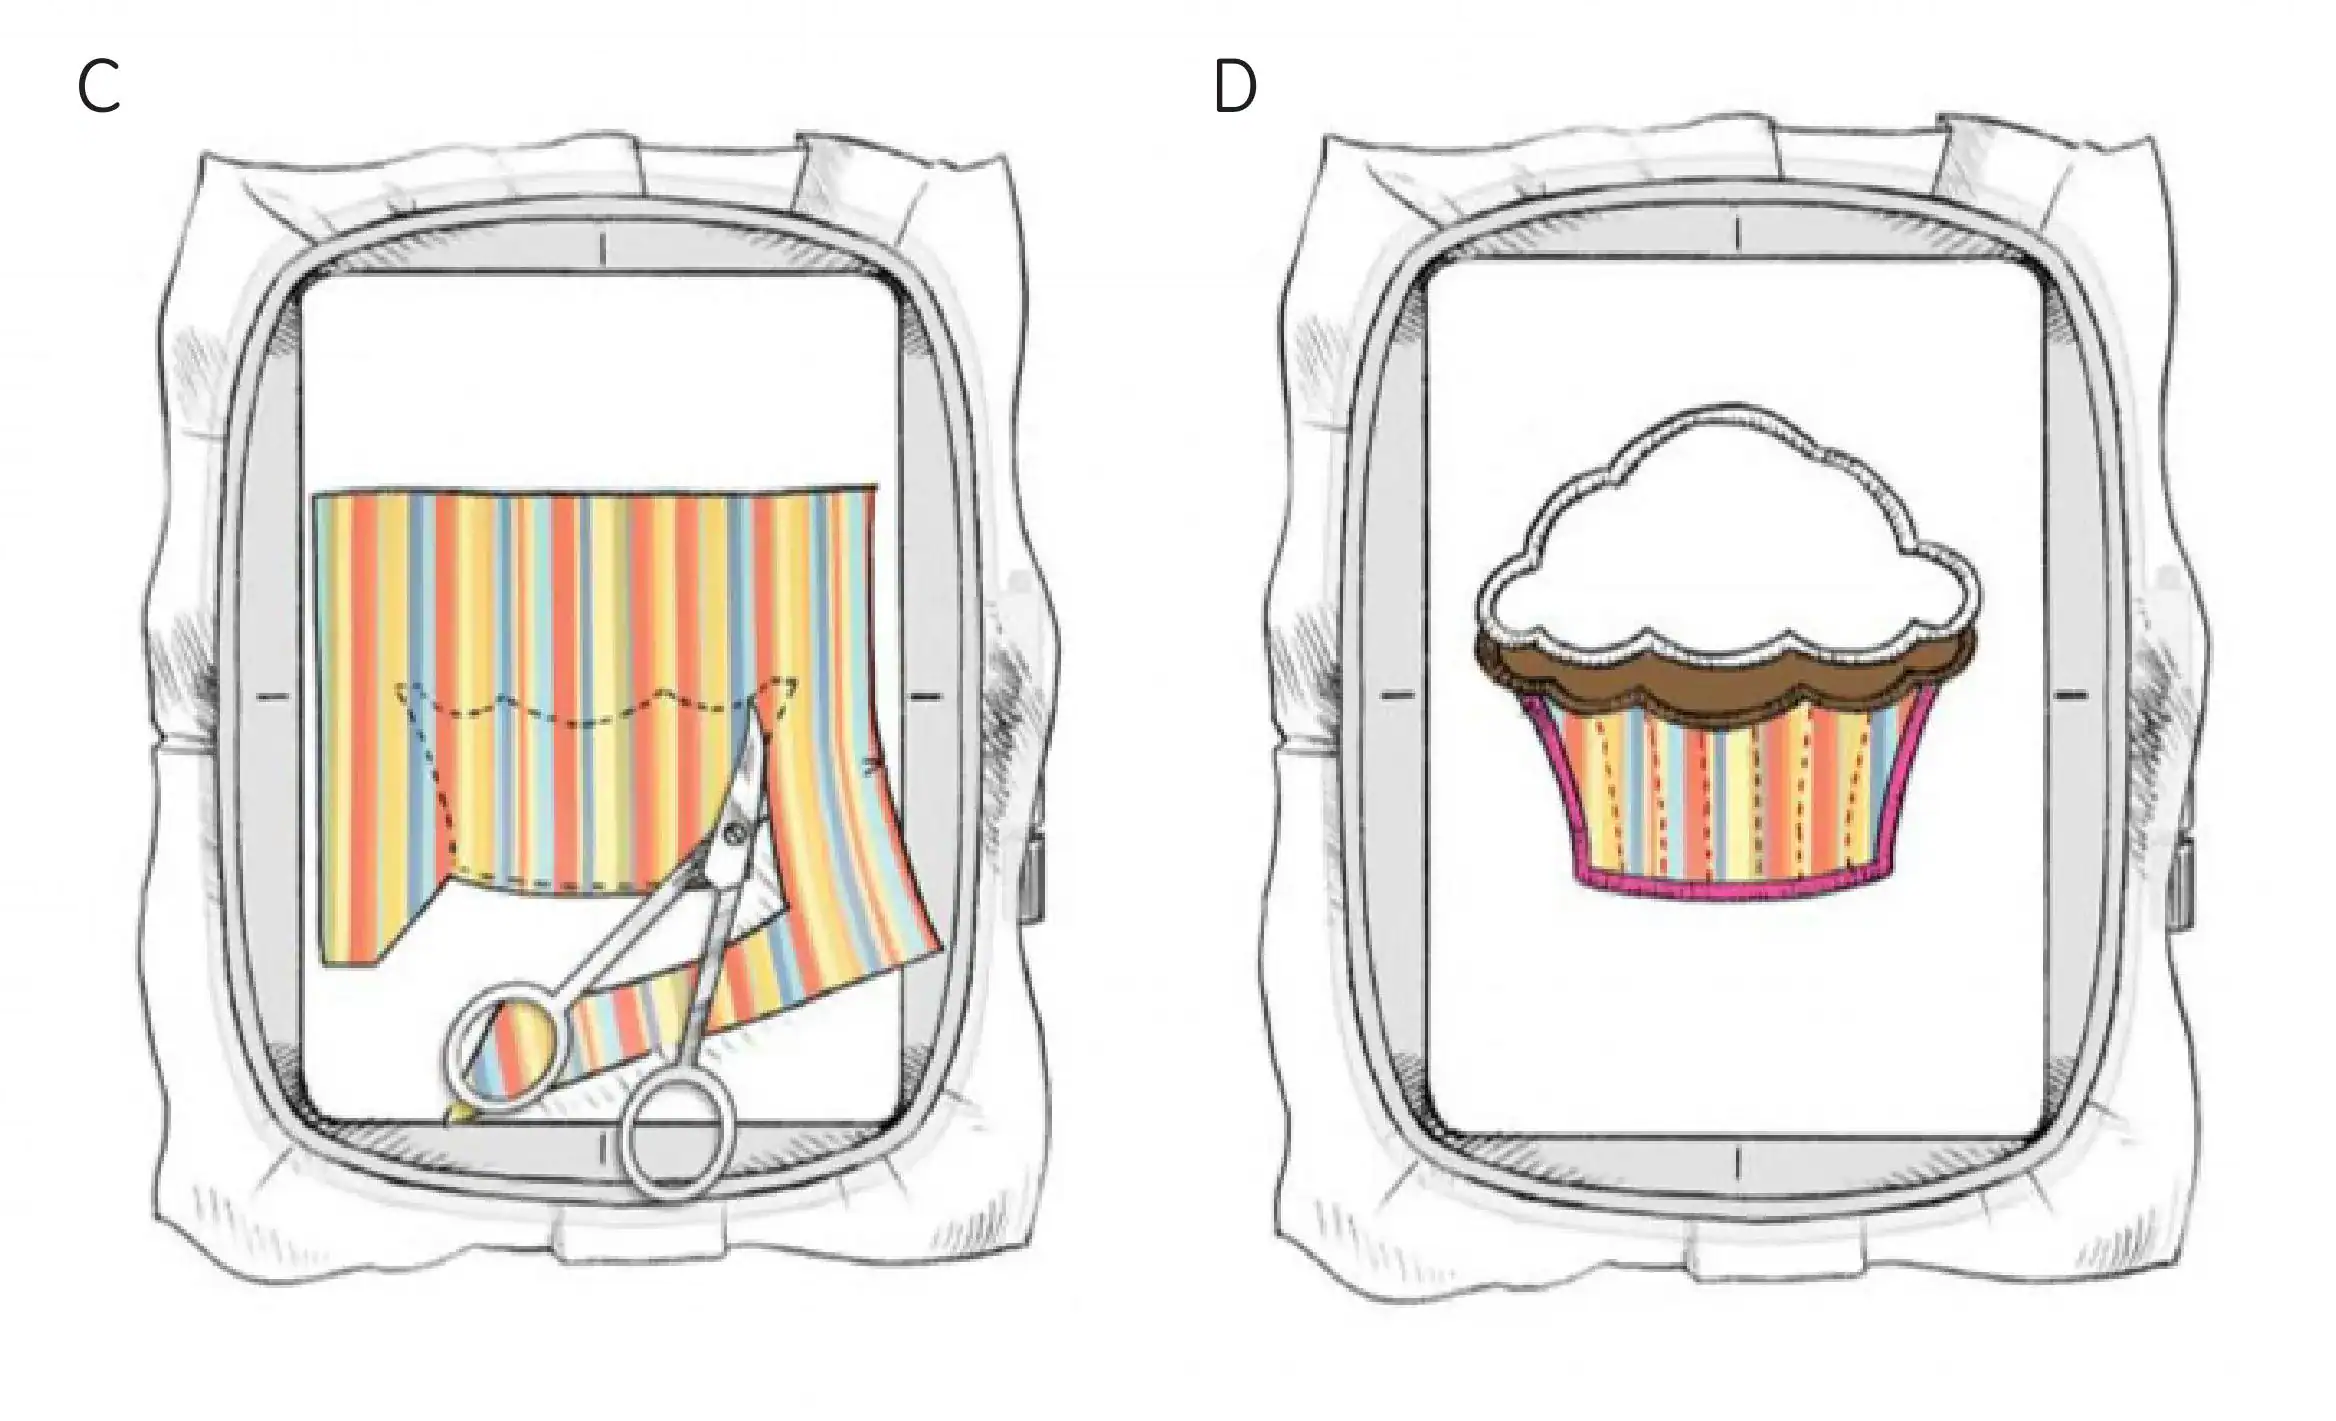
3.Place a fabric scrap larger than the outline over the placement stitches. Keep the fabric smooth and unstretched, then stitch the tack-down line.
4.Remove the hoop without disturbing the stabilizer. Trim the excess fabric close to the tack-down stitches, taking care not to cut the embroidery.
5.Return the hoop to the machine and stitch the next design section. Repeat the placement, tack-down, trim and finishing sequence for each cupcake element.
6.When complete, cut the cupcake close to its outer embroidery perimeter. Check that the satin edge is intact and that no loose threads remain.
 How to Make a Birthday Banner with Machine Embroidery and Appliqué — Complete Sewing Tutorial

Step 2: Embroider the lettering

1.Load the appliqué alphabet and hoop fresh cut-away stabilizer.
2.Stitch the outline of the first letter, cover it with a coordinating fabric scrap, and stitch the tack-down line.
3.Remove the hoop, trim the fabric close to the stitches, replace the hoop and stitch the remaining letter details.
4.Repeat for the full phrase. Use “Happy Birthday” for the original composition, or use a Cyrillic appliqué alphabet for “С днём рождения,” a child’s name or an age number.
5.Cut each letter close to the satin edge. Before attaching the letters, make a paper layout so the spacing follows the upper and lower curve of the circle.

Step 3: Make removable candles

1.Apply fusible stabilizer to the wrong side of the white felt according to the stabilizer manufacturer’s instructions.
2.Hoop the felt, rotate the candle design 90 degrees and move it to the top of the machine screen.
3.Add the desired number of candles and embroider them. The reference composition uses three, but the construction works with any number.
4.Remove the felt from the hoop and cut out each candle close to the embroidery.
5.Cut a 2-inch (5 cm) length of the hook side of the hook-and-loop tape for every candle. Center it on the wrong side of each candle, approximately ¼ inch (6 mm) from the edge, and stitch down the lengthwise center.
6.The loop side will be sewn to the banner after the final candle positions are checked. This makes the candles removable and easy to store in the back pocket.

Step 4: Build the central circle

1.Place the fabric circle wrong side up on a pressing surface. Center the 13½-inch (34.3 cm) paper circle on it.
2.Fold the fabric edge toward the wrong side over the paper template, clipping the seam allowance where necessary. Press the folded edge.
3.Remove the paper and check the circle. Minor irregularities will be hidden by the perimeter stitching.
4.Place the cupcake appliqué on the circle, approximately 1½ inches (3.8 cm) above the lower edge and centered from side to side. Pin it in position.
5.Stitch each cupcake element with matching thread using a narrow zigzag or satin stitch around the appliqué perimeter.
6.Arrange the letters evenly along the top and bottom curves. Pin first, then straight-stitch just inside the satin edge.

Step 5: Construct the pieced front

1.With right sides together, join one 2½-inch square to each short end of a 19½-inch strip. Press the seams open. Repeat for the second strip.
2.Sew the two 20-inch strips to the long edges of the striped front rectangle and press the seams open.
3.Sew the pieced strips with corner squares to the top and bottom edges. Press carefully and check that the stripes remain aligned.
4.Finish the pocket perimeter by folding it twice toward the wrong side by ¼ inch (6 mm). Press and topstitch.

Step 6: Add the backing, pocket and tabs
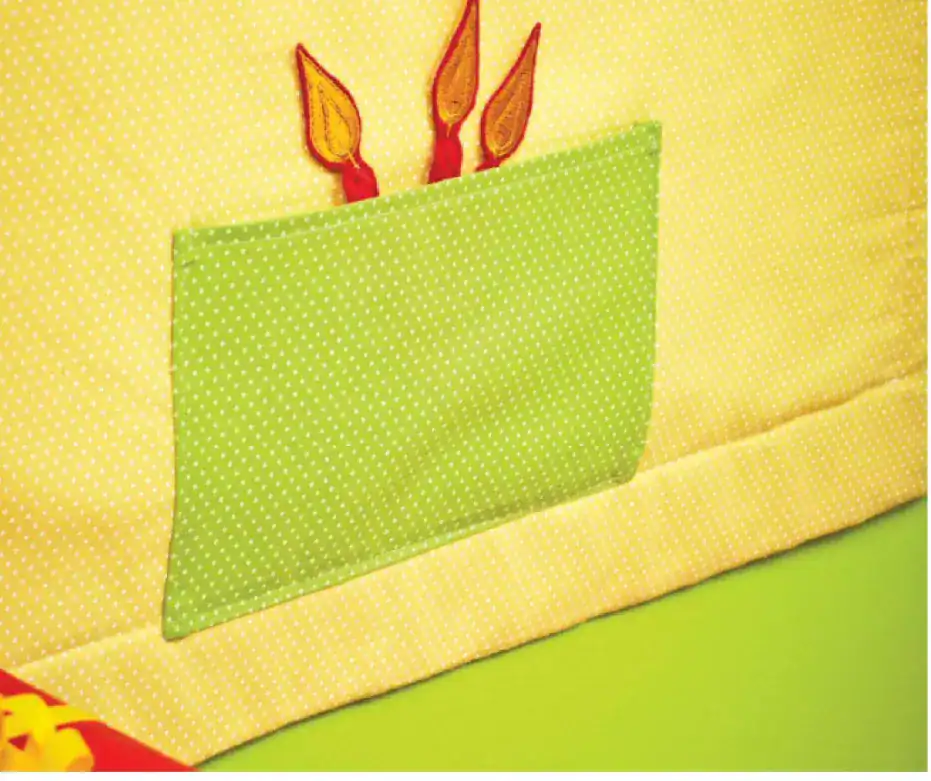
1.Place the backing rectangle right side up. Center the pocket about 2¼ inches (5.7 cm) above the lower edge. Stitch the sides and bottom, leaving the top open.
2.Fold each tab rectangle in half lengthwise, right sides together. Stitch the long open edge, press the seam open and turn right side out.
3.Fold each tab in half across its width and baste the short ends. On the front, place two tabs about 1½ inches (3.8 cm) from the side edges and the other two about 7½ inches (19 cm) from the side edges. Baste them to the upper edge.
How to Make a Birthday Banner with Machine Embroidery and Appliqué

Step 7: Assemble, turn and quilt

1.Place the front and backing right sides together. Align the raw edges. The pocket should be on the backing and should face outward after turning.
2.Stitch around the perimeter, leaving a centered opening of about 9 inches (23 cm) along the lower edge.
3.Insert the batting between the fabric layers. Fold the turning-opening seam allowance inward and hand-stitch the opening closed.
4.Turn the banner right side out, push out the corners and press. Make sure the hanging tabs are not twisted.
5.Set the machine to a narrow zigzag and stitch along each border-strip seam to secure the layers and emphasize the frame.
6.Place the loop side of the hook-and-loop tape on the banner. Attach the candles and check that they sit level before stitching the tape permanently.
How to Make a Birthday Banner with Machine Embroidery and Appliqué

Troubleshooting and quality checklist

•Appliqué shifts: mark the center of the circle and pin the layout before stitching.
•Fabric puckers: use the correct stabilizer and never stretch the appliqué fabric over the tack-down area.
•Edges fray: trim only after the tack-down stitch and preserve the satin border.
•Lettering looks uneven: create a paper mock-up and mark the curve before stitching.
•Tape will not attach: the hook side belongs on the candles and the loop side on the banner; test the pair before sewing.
•Corners are bulky: trim batting and excess seam allowance before turning, without cutting the seam.
•Stripes do not match: pin border seams at the stripe intersections and press after every seam.

Adaptations

Replace the English phrase with a child’s name, “Happy Birthday,” “other  language ,” or an age number. If your hoop is smaller than the cupcake, split the design into hoop-sized sections or scale down the motif proportionally. Without an embroidery machine, trace the shapes and use hand satin stitch, backstitch, or a regular-machine zigzag. Snaps or magnetic tape can replace hook-and-loop tape, but hook-and-loop is especially practical when the candles will be removed often.

Care and safety

Remove the candles before washing. Hand-wash or use a delicate, low-temperature cycle; press from the wrong side through a pressing cloth and never iron directly over raised embroidery. Store the candles in the back pocket. For a young child, secure every component carefully and do not leave loose candles or small fasteners unattended.

Frequently asked questions

Can I make this banner without an embroidery machine?

Yes. Transfer the outlines to fabric and use hand embroidery, satin stitch, backstitch, or a decorative zigzag on a regular sewing machine.

How many candles should I make?

Any number works. Three candles match the reference design, while an age-specific number makes the banner personal.

Can linen replace cotton?

Yes, but linen frays and can distort more easily. Pre-wash it, use a stronger stabilizer and avoid stretching it in the hoop.

What if I do not have cut-away stabilizer?
A tear-away stabilizer may work for a small, lightly stitched design, but test it first. Dense appliqué is more stable with cut-away support.
Perfecting embroidery designs from the start: a practical guide to digitizing

Perfecting embroidery designs from the start: a practical guide to digitizing

Digitizing is where a sketch becomes stitchable. It sounds simple until the first test run comes back puckered, stiff, or missing details that looked fine…

0 comments
How to Make a Birthday Banner with Machine Embroidery and Appliqué — Complete Sewing Tutorial

How to Make a Birthday Banner with Machine Embroidery and Appliqué — Complete Sewing Tutorial

Quick answer: Make a reusable textile banner approximately 19½ × 20 inches (49.5 × 50.8 cm), decorate a 14-inch (35.6 cm) fabric circle with a…

0 comments
How to Choose the Perfect Machine Embroidery Designs for Clothing

How to Choose the Perfect Machine Embroidery Designs for Clothing

Introduction Machine embroidery has transformed the way we customize and personalize clothing, offering endless possibilities to express creativity and style. Whether you’re an entrepreneur looking…


2 comments
Machine embroidery in the United States

Machine embroidery in the United States

Machine embroidery in the United States Machine embroidery is one of the most popular types of needlework in the United States. It has become popular…

0 comments