
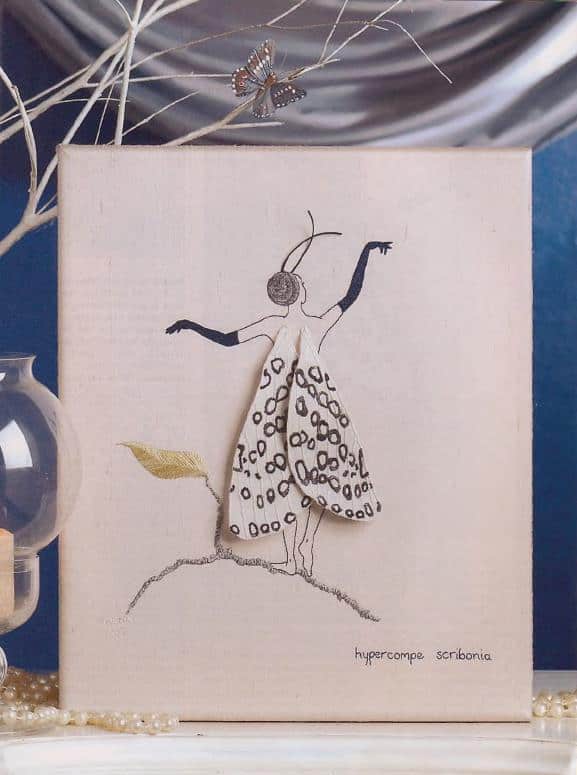
Embroidery project -Hypercompe Scribonia
Embroidery project -Hypercompe Scribonia
People have always had a fascination with the creatures of the air, and Taetia McEwen is no exception.
Butterflies, in particular, have a glorious sense of freedom and a gracefulness we dream of sharing.
MATERIALS
- • 60cm x 50cm (24in x 20in) rectangle o f champagne dupion silk
• 25cm (lOin) square o f white or cream French crepe – use dupion silk as a substitute
• 20cm x 10cm (8in x 4in) rectangle o f palest pink chiffon
• 20cm x 10cm (8in x 4in) rectangle o f fusible webbing
• DMC Stranded Embroidery Cotton: 1 skein each o f white (blanc), black (310), medium navy blue (311) - • Gum nut Yarns ‘Stars’ stranded silk: 1 skein each of 675, 994, 998
- • 2, 5cm (2in) lengths of 30-gauge wire
• Crewel embroidery needles
• No 9 milliner’s (straw) needle
• Aquadhere glue
• Sharp pencil
• Baking paper
• 30cm (12in) and 20cm (Sin) embroidery hoops
• General sewing requirements - FINISHED SIZE
Design area: 23cm x 20cm (9in x 8in)
STITCHES USED
Backstitch, herringbone stitch, overcast stitch, satin stitch, stem stitch
PREPARATION
Trace the outline of the girl’s body and all her features from the pattern sheet onto the middle of the champagne silk so she is standing along the shorter side. Trace the outline of her body onto the paper side of the fusible webbing and cut it out very neatly on the line with sharp scissors. With the iron on a warm setting,
put the webbing glue side down inside the outline on the silk and fuse it in place. W hen it is cool, peel the paper off and cover it smoothly with the chiffon. T hen Cover it with baking paper and iron it again. Don’t
trim the edges of the chiffon until after them broidery is complete. Trace the wings from the pattern
sheet onto the French crepe. Put the silk in the larger hoop and tension it drum -tight.
EMBROIDERY
Outline: Thread the milliner’s (straw) needle with one strand of black (310) and work tiny backstitches
around the girl, including her features. Don’t carry the thread across behind the work as it shows on the front.
Gloves: Work lines of stem stitch close together along the arm s and fingers to fill them completely with
one strand of medium navy blue (311) in a fine prewel needle.
Cap: Fill this with close rows of stem stitch in two ‘ Strands of ‘Stars’ 994.
Work it in an outward spiral starting at the point marked on the pattern sheet to give the head shape.
When this is complete, take the embroidery out of the hoop and trim the surplus chiffon away
carefully with a small pair of sharp-pointed scissors.
Antennae: W rap the two lengths of w ire tightly with one strand of medium navy blue (311), leaving
about 1 cm (³⁄8 in) uncovered to secure to the back. Put a tiny dab of Aquadhere on the thread to keep
it in place and leave it to dry. Leaf and branch: Thread a crewel needle with two strands of ‘Stars’ 994 and one strand of 998. Sew uneven, overlapping satin stitches for the branch.
Work herringbone stitch closely with one strand of ‘Stars’ 675 for the leaf. The stitch direction of the
two halves of the leaf is about a right angle, and the light reflects differently on them .
Lettering: Work this in tiny backstitches with one strand of medium navy blue (311).
Wings: Put the traced French crepe in the smaller hoop and thread the milliner’s (straw) needle with
one strand of white (blanc). Cover the outline and veins with two strands of white (blanc) laid along
the lines, then work overcast stitch – or tiny satin stitches – over them . Leave the top sections unstitched as shown on the pattern sheet.
Work the markings in tiny satin stitches with one strand of ‘Stars’ 998 after the veins are done.
Then take the French crepe out of the hoop.

ASSEMBLY
Cut the wings out neatly and attach them at the shoulder points with two strands of white (blanc). Anchor them
to the silk with an extra stitch at the places marked on the pattern.
Poke the antennae through from the top of the head and secure them to the back of the cap so the stitches don’t
show through. Bend them to shape.
Download the pattern for embroidery Hypercompe Scribonia
Download


